


Creating Content on Onedio in 14 Steps

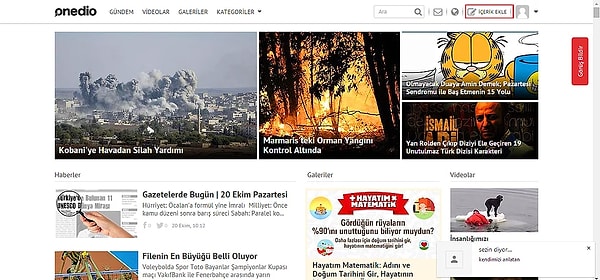
1. Let's start step-by-step, above the button on the top right of our Onedio homepage.
2. When you come to this section, you can see the Add Gallery in the downward sliding menu.
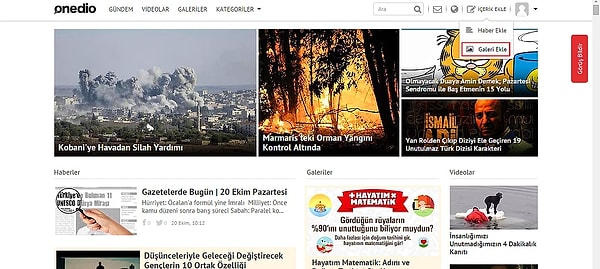
3. If you click on the Add Gallery button, we will be directed to this page which is required to create our content! Let's start with the title first.
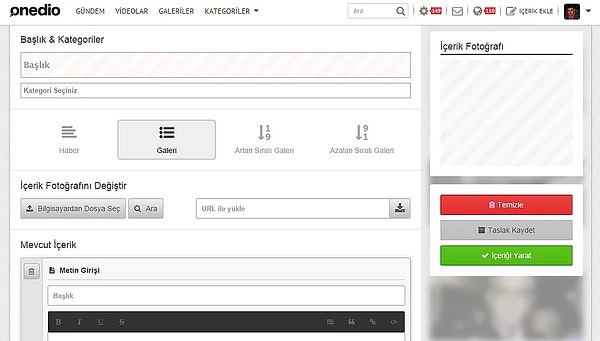
It's important that your title is interesting. What you are describing in the content or you can ask yourself what kind of questions you can read your content.
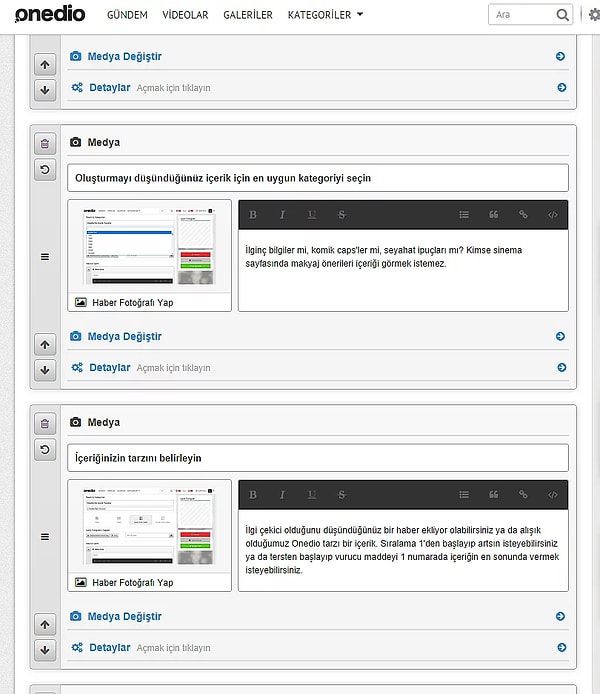
4. Select the category that best fits for the content you think you are building.
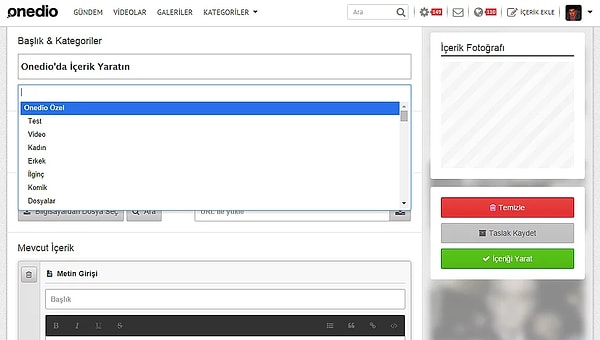
Interesting information, funny caps, travel tips? No one wants to see the makeup suggestion content on the cinema page. Women, Men, Relationships, Travel are just a few of our most popular categories!
5. Specify the style of your content.
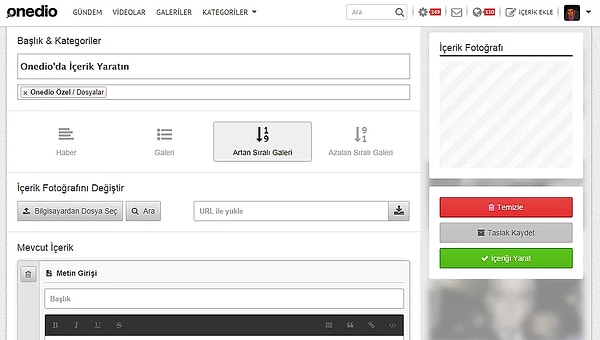
You might be adding a piece of news that you think might be interesting, or something we're used to onedio-style content. You may want to start from rank 1 or increase, or you may want to start tersten and give the strike item number 1 at the end. So what is this point we want to do? 1-2-3-4 or countdown to 10-9-8-7? If you want to progress normally, the Row Sequential Gallery will be our option. But if we want Countdown, we will choose the Descending Sequential Gallery.
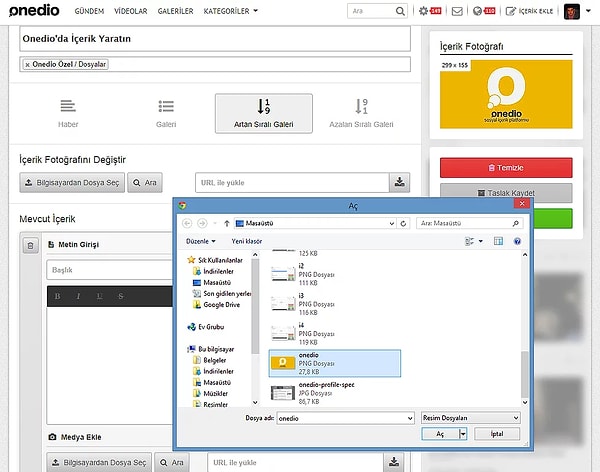
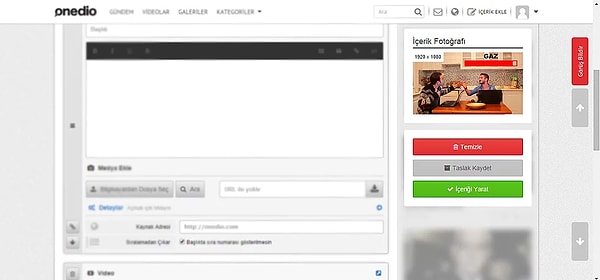
6. Come on to the content photo.

The photo you choose will be in Onedio, and this photo will be used in sharing. The higher the quality, the better.
You can paste the link of the photo you want to use, or
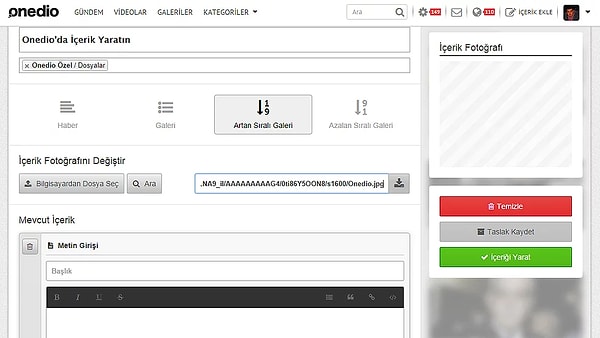
You can easily select one of the photos stored on your computer.
7. You can add a little comment before you import
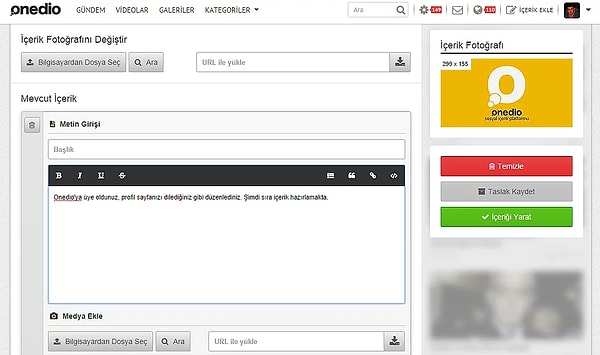
This text box is automatically exiting. It is your initiative not to write or write something. But before people start reading your content, you may want to make a small statement.
Now that we've laid the foundation for our content, now we can begin to build the main part.
8. First we select the "Picture" tab from the Add New Entry box.
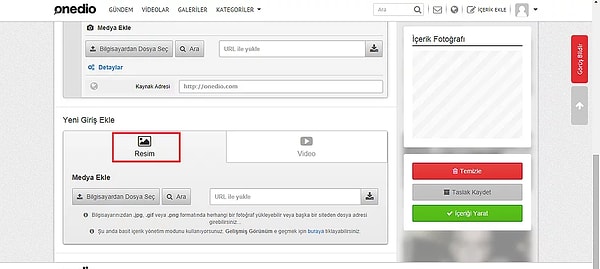
The same logic in the content photo step. You can copy the link or easily upload your saved photo.
9. Add title and description for first mediterranean.
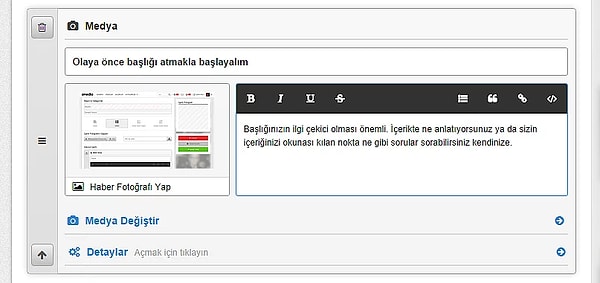
10. In this way, add the items you want to have in your content one by one.
11. To change to a photo in an item, click the "Change Media"
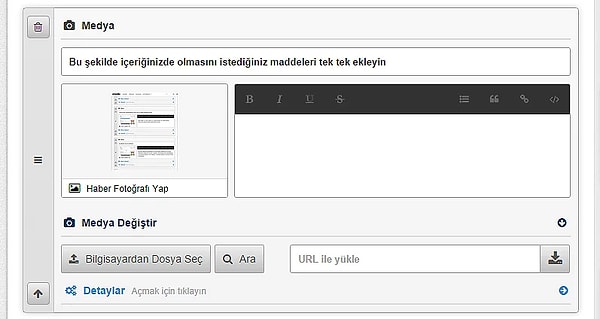
You've found a better photo and you want to put it. Click 'Change Media' and then load the classic photo from the pop-up box.
12. Do not drown in details.
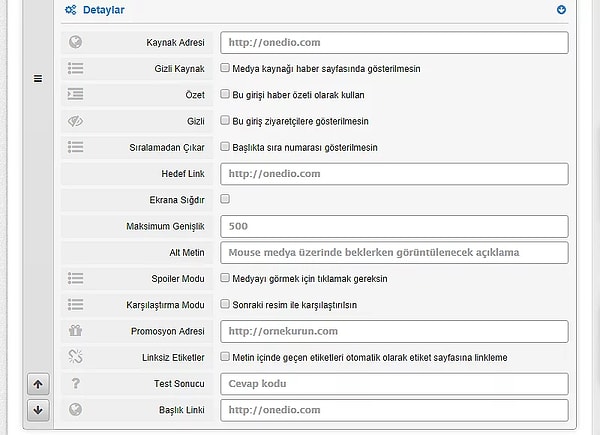
In the Details section you can specify the source address of your photo, you can remove the bonus items you added at the end of the content in order, you can make it visible by clicking on the photo you added with spoiler mode.
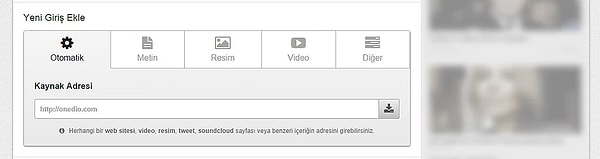
13. "No, we want to make a video, not a picture gallery." Or "We want to add Video at the end of our gallery." You can say. No problem.
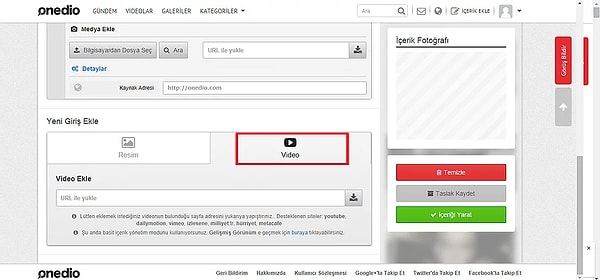
Immediately in the text box, select Video instead of Picture. We will use the same rationale we use when adding images. Let's wait for the video we uploaded from any URL to be uploaded.
14. After adding your video, there are some things we need to look out for.
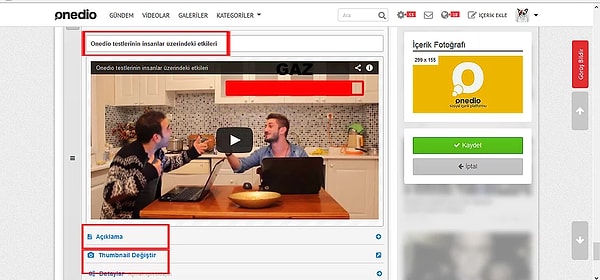
It is very important to link our title to the content of your content (the place where we mark the first red area for you to see easier). So, let's say our topic is 'Prepare a Test on Onedio in 20 Steps', and we will be able to explain it to you. When it comes to the latest material, the video, it must be a somewhat binding effect. In other words, instead of leaving the title of the video to its own destiny, turning it into a material or translating it into a binding sentence is crucial to the vivacity of the video. At the end of a content we talked about preparing a test, we can put a title like 'The effects of Onedio tests on people'.
If we have an explanation we need to do, we will open our Caption field if we click on the description (the second box marked with a red field), just like 'under article explanations'.
After we have done this, we go to the 'Change Thumbnail' section. Of course, not necessarily, but some of our users prefer to have a specific 'cover' photo from a snapshot taken from the video, before starting to play the video 'play' (the third box marked with the red field). Thumbnail change at this point is a tab that will benefit our business. By clicking on it, we can easily add a Video Capshot with the same image / gif.
Another important issue is that we mentioned earlier in the 'Details' section. 'Remove From Sequence: Do not show the sequence number in the title.' Option. If your videotapes are to create an item, say 12 of the '12 Romantic Gestures We Can Do to Your Love', you do not need to tick this option, but if you have finished 12 items and put the video for a complementary purpose, then 'Remove Sequence: ' We can prevent the video from becoming an item.
15. We're ready for the bow!
After finishing our gallery we will see 3 options to the right of the page: Clear, Save Draft, Create Content.
Clear, all the operations you do provide you with all the content you need.
Draft Save allows you to save easily without losing the draft you are working on as the name implies. You can continue later.
Create Content is the last step you need to take to show your content is ready and to post it after the moderator team has approved it. :) Good luck with!
Keşfet ile ziyaret ettiğin tüm kategorileri tek akışta gör!
 Test
Test
 Gündem
 Magazin
 Video
Video


Yorum Yazın